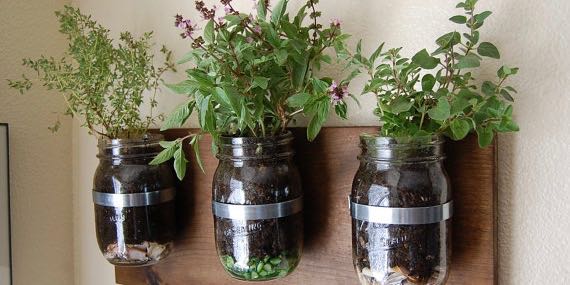
Let’s explore the fun of DIY Mason Jar Herb Garden
Come springtime, I always have a glut of empty mason jars that have been emptied gradually over the fall and winter. They clutter up our gardening shed, clinking around and getting in the way of things. It’s too early in the year to start canning — so — how to make good use of some of those quart jars? Build a mason jar herb garden in your kitchen! DIY Mason Jar Herb Garden. 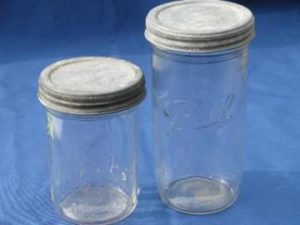
This project shows how to mount a vertical herb garden on a wall, freeing up valuable real estate on the countertop or windowsill. First, make sure you choose a spot that gets plenty of natural light. For growing herbs, try to choose a spot that’s in close proximity to a window because plants like rosemary, basil, dill and sage need a lot of light. But if your spot gets only indirect light, you might want to consider growing chives, parsley, mint, cilantro, tarragon, oregano and lemon balm, all of which do quite well in slightly shadier spots.
You’ll need to gather these ten items to create your mason jar herb garden:
- Wooden board(s)
- Wall adhesive
- Tapcon screws
- Hose clamps
- Cable staples (3/4-inch)
- Mason jars (quart size)
- Potting soil
- Charcoal
- Rocks
- Plants
Since mason jars don’t have holes in the bottom for natural drainage, we’ll need to include one layer each of rock and charcoal on the bottom so water doesn’t rot the roots inside the jar. The rocks help to provide drainage, and the charcoal prevents bacterial growth in the soil due to standing water. Bacteria in the soil can damage the plant’s roots, and lead to disease or death of plants. Charcoal also balances the soil’s pH level, and helps with drainage, too.
To start, find a piece of reclaimed wood for the backing. This will be attached to your wall. Two-by-fours are the perfect size and length. You may want to sand and/or varnish the wood.
Lay the hose clamps and mason jars on the wooden board in order to eyeball where they should go at first and gauge their spacing. Mark the spots where you’ll want your jars mounted before measuring so that you can decide how many mason jars to fit onto your plank(s).
Place the wooden board(s) on the wall so you can get a sense of where you would like to position it, then use the wall adhesive to temporarily secure the board(s). This is just the preliminary step to make the board(s) is secure on the wall. Then, considering it’s going to hold some serious weight on a vertical surface, use the Tapcon screws to secure board(s) to wall studs. (Depending on your wall surface, you may be able to use different screws. For an old brick wall, the Tapcon screws work best.)
Find the centerline of the hose clamps and hammer them into place where you made your marks on the board(s). The 3/4-inch cable staples can be easily hammered.
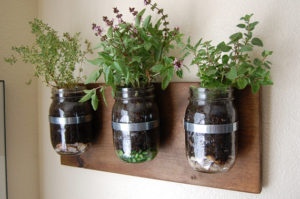
Layer 1” of rocks in the bottoms of the mason jars. Then add a 1/2” layer of charcoal on top of the rocks. Top off with soil, and plant your plants in the mason jars. A nice benefit of using mason jars is that, because they’re clear, you can visually gauge when your plants’ roots need watering.
Secure the planted mason jars into the hose clamps. Be sure to tighten the clamps super tight so the jars don’t slip out! For a video tutorial by Summer Rayne Oakes of MindBodyGreen, see below:
Once you have herbs growing, here are some fun tips for using them.